Upload Helm Charts
This article explains how to upload Helm charts. See the steps below.
-
Add a Helm repository, refer to Adding a Third-Party Helm Repository for the procedure.
-
Upload the Helm Chart to the Helm repository.
Note
This method is suitable for Harbor, ChartMuseum, JFrog type repositories.
-
Log in to a node that can access the Helm repository, upload the Helm binary to the node, and install the cm-push plugin (VPN is needed and Git should be installed in advance).
Refer to the plugin installation process.
-
Push the Helm Chart to the Helm repository by executing the following command:
Parameter descriptions:
charts-dir: The directory of the Helm Chart, you can also directly push a packaged chart (i.e., a .tgz file).HELM_REPO_URL: URL of the Helm repository.username/password: Username and password with push permissions for the Helm repository.- If using https access, add the parameter
--insecure
Note
This method is only applicable to Harbor repositories.
-
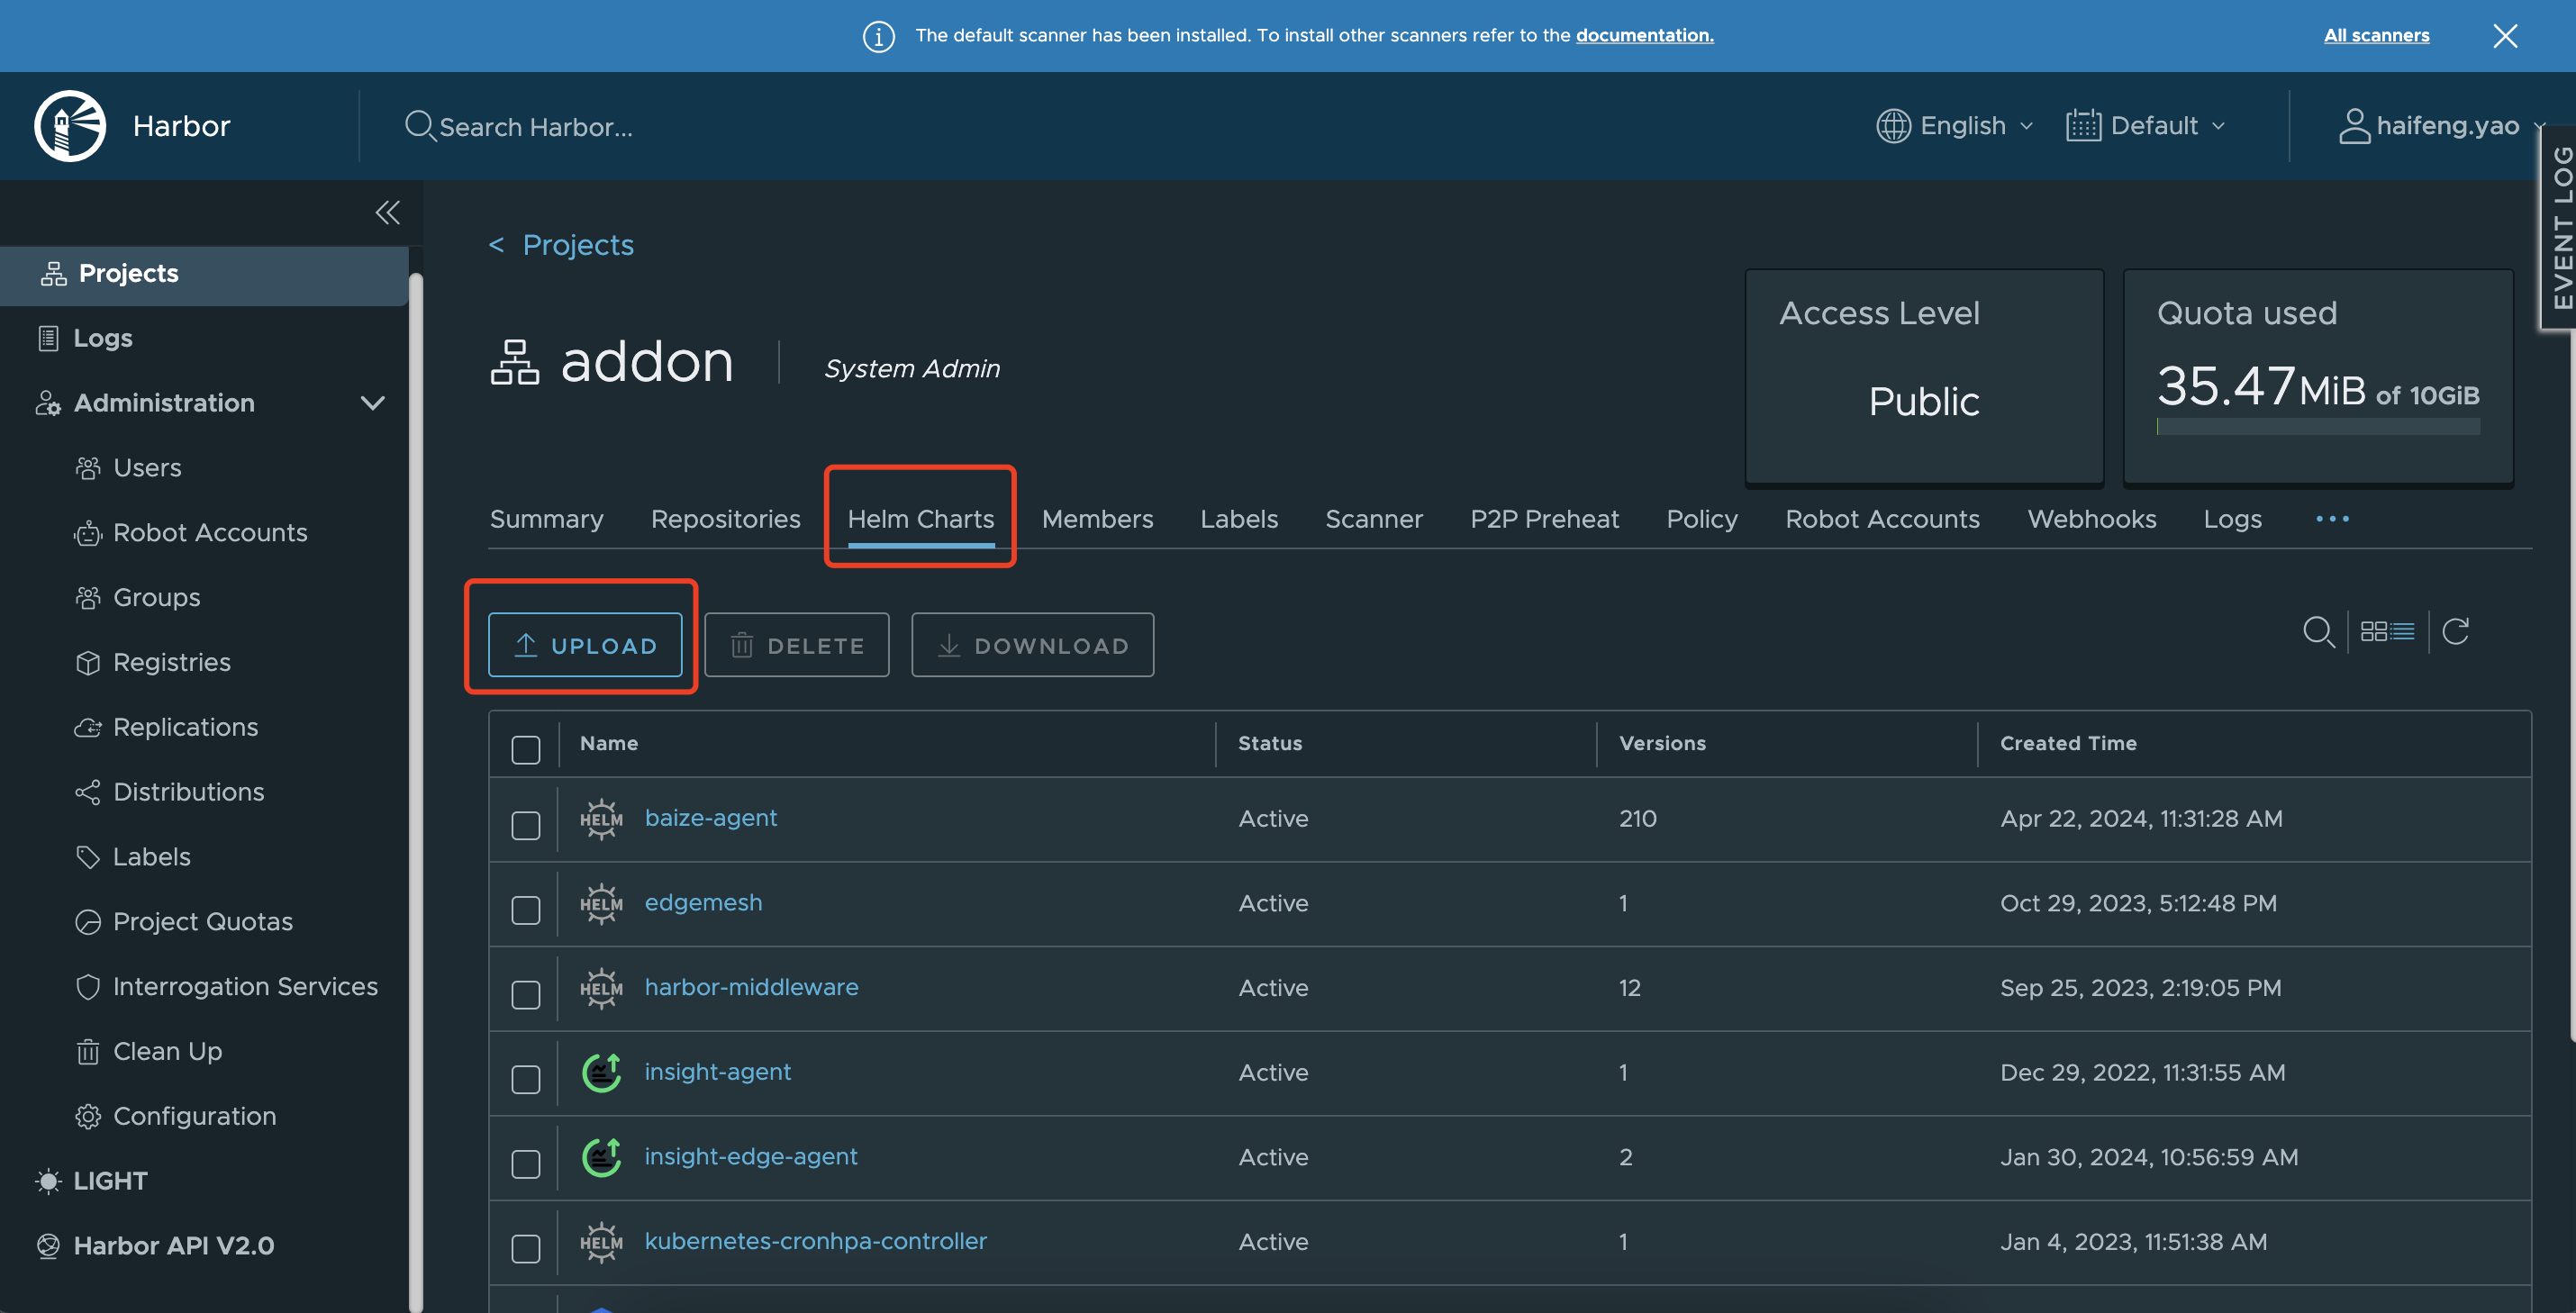
Log into the Harbor repository, ensuring the logged-in user has permissions to push;
-
Go to the relevant project, select the Helm Charts tab, click the Upload button on the page to upload the Helm Chart.
-
-
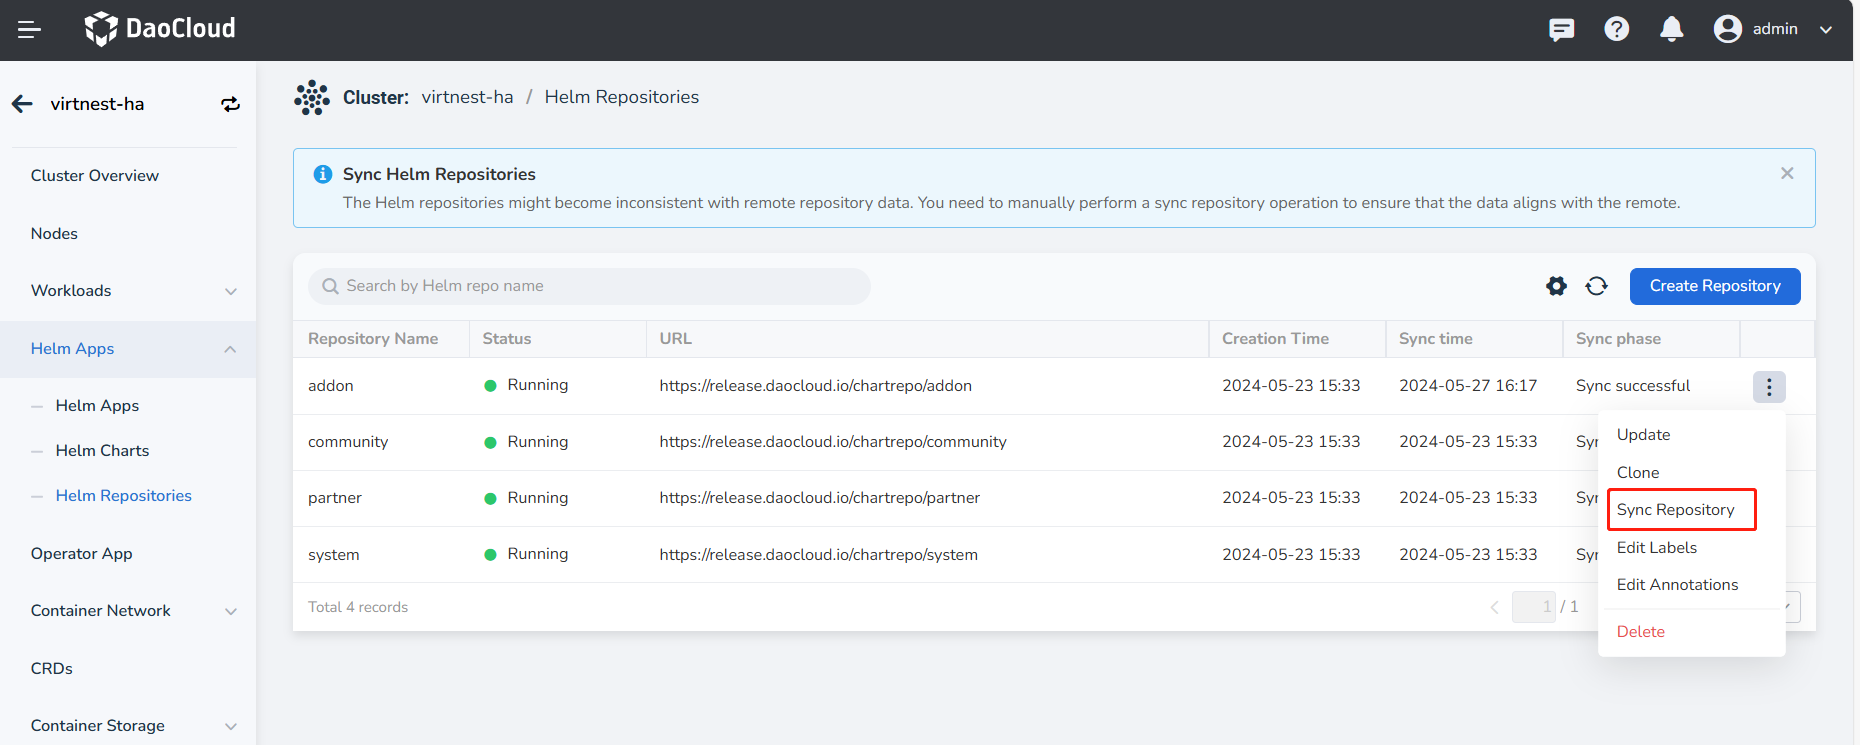
Synchronize remote repository data
If the cluster settings do not enable Automatic Helm Repository Refresh , manual synchronization is required. The general steps are:
Go to Helm Apps -> Helm Repositories , click the Sync Repository action button on the right side of the corresponding repository list to complete the repository data synchronization.