Install kubernetes-cronhpa-controller
The container copy timing horizontal expansion and contraction policy (CronHPA) can provide stable computing resource guarantee for periodic high-concurrency applications, and kubernetes-cronhpa-controller is a key component to implement CronHPA.
This section describes how to install the kubernetes-cronhpa-controller plugin.
Note
In order to use CornHPA, not only the kubernetes-cronhpa-controller plugin needs to be installed, but also install the metrics-server plugin.
Prerequisites
Before installing the kubernetes-cronhpa-controller plugin, the following prerequisites need to be met:
-
In the Container Management module Access Kubernetes Cluster or Create Kubernetes Cluster, and can access the cluster UI interface.
-
Create a namespace.
-
The current operating user should have NS Editor or higher permissions, for details, refer to Namespace Authorization.
Steps
Refer to the following steps to install the kubernetes-cronhpa-controller plugin for the cluster.
-
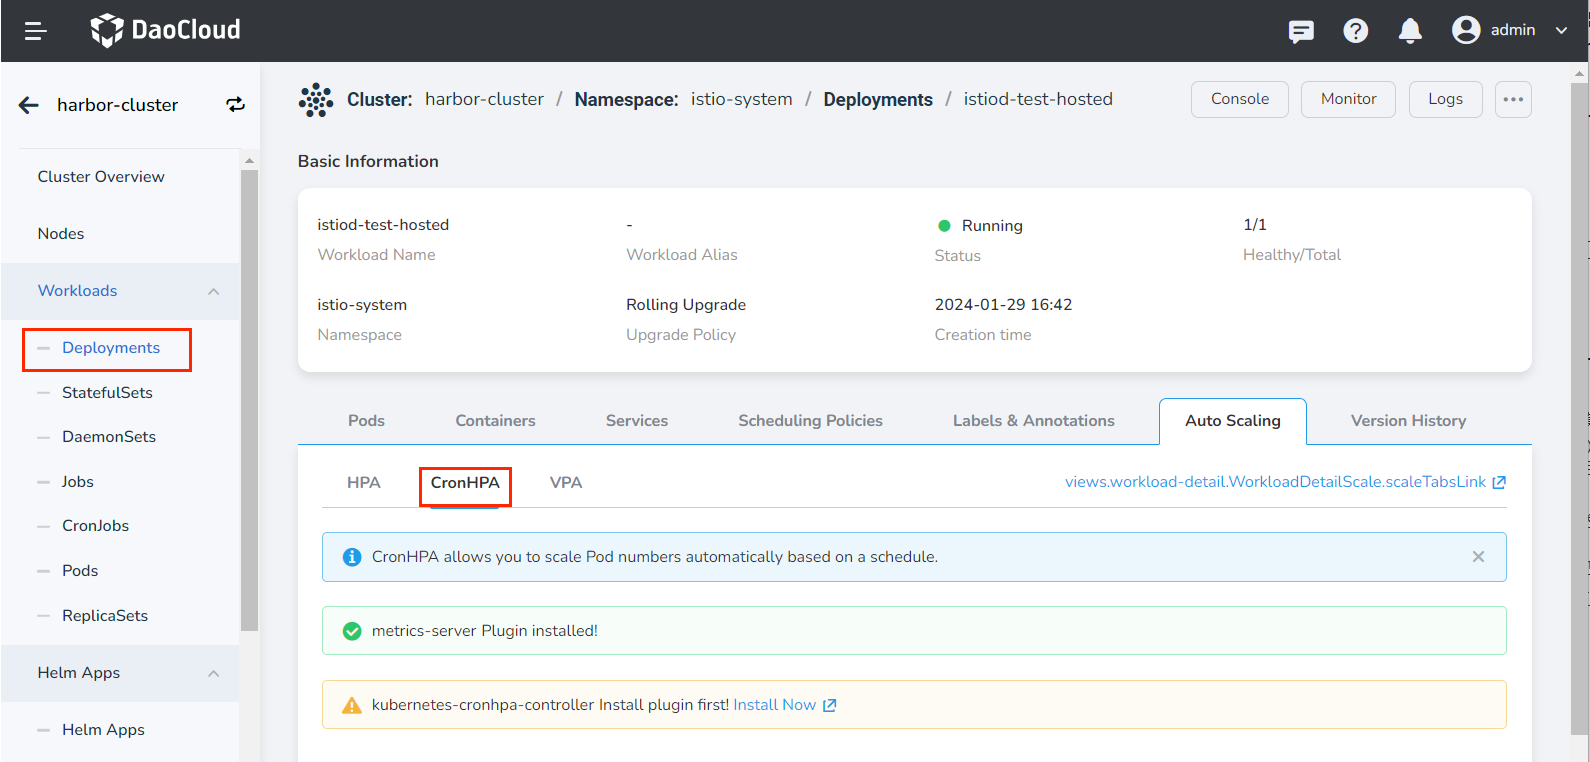
On the Clusters page, find the target cluster where the plugin needs to be installed, click the name of the cluster, then click Workloads -> Deployments on the left, and click the name of the target workload.
-
On the workload details page, click the Auto Scaling tab, and click Install on the right side of CronHPA .
-
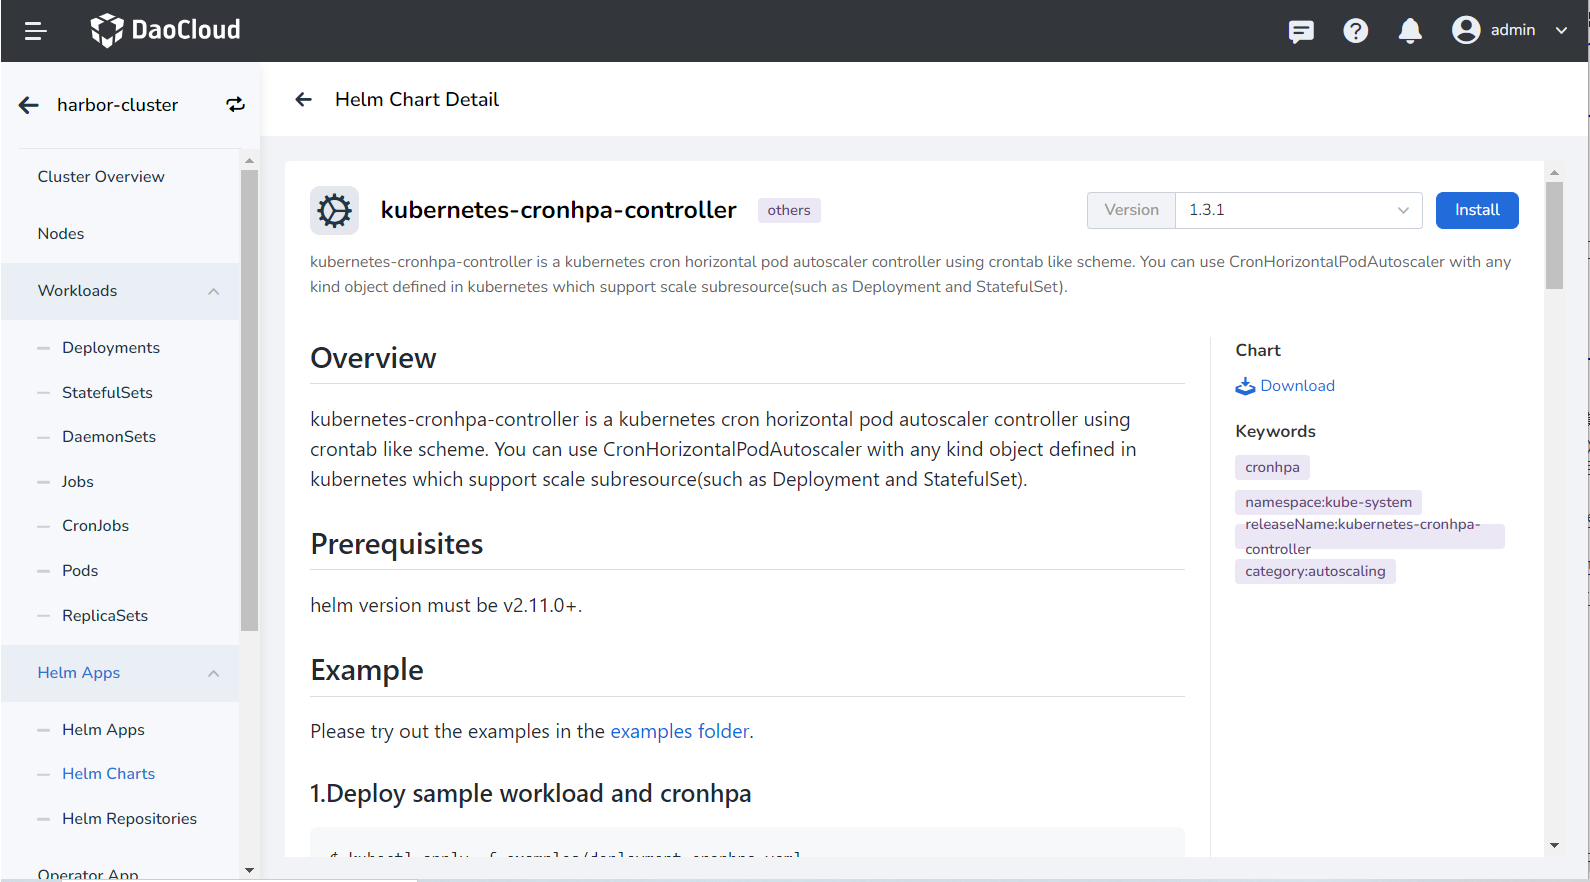
Read the relevant introduction of the plug-in, select the version and click the Install button. It is recommended to install 1.3.0 or later.
-
Refer to the following instructions to configure the parameters.
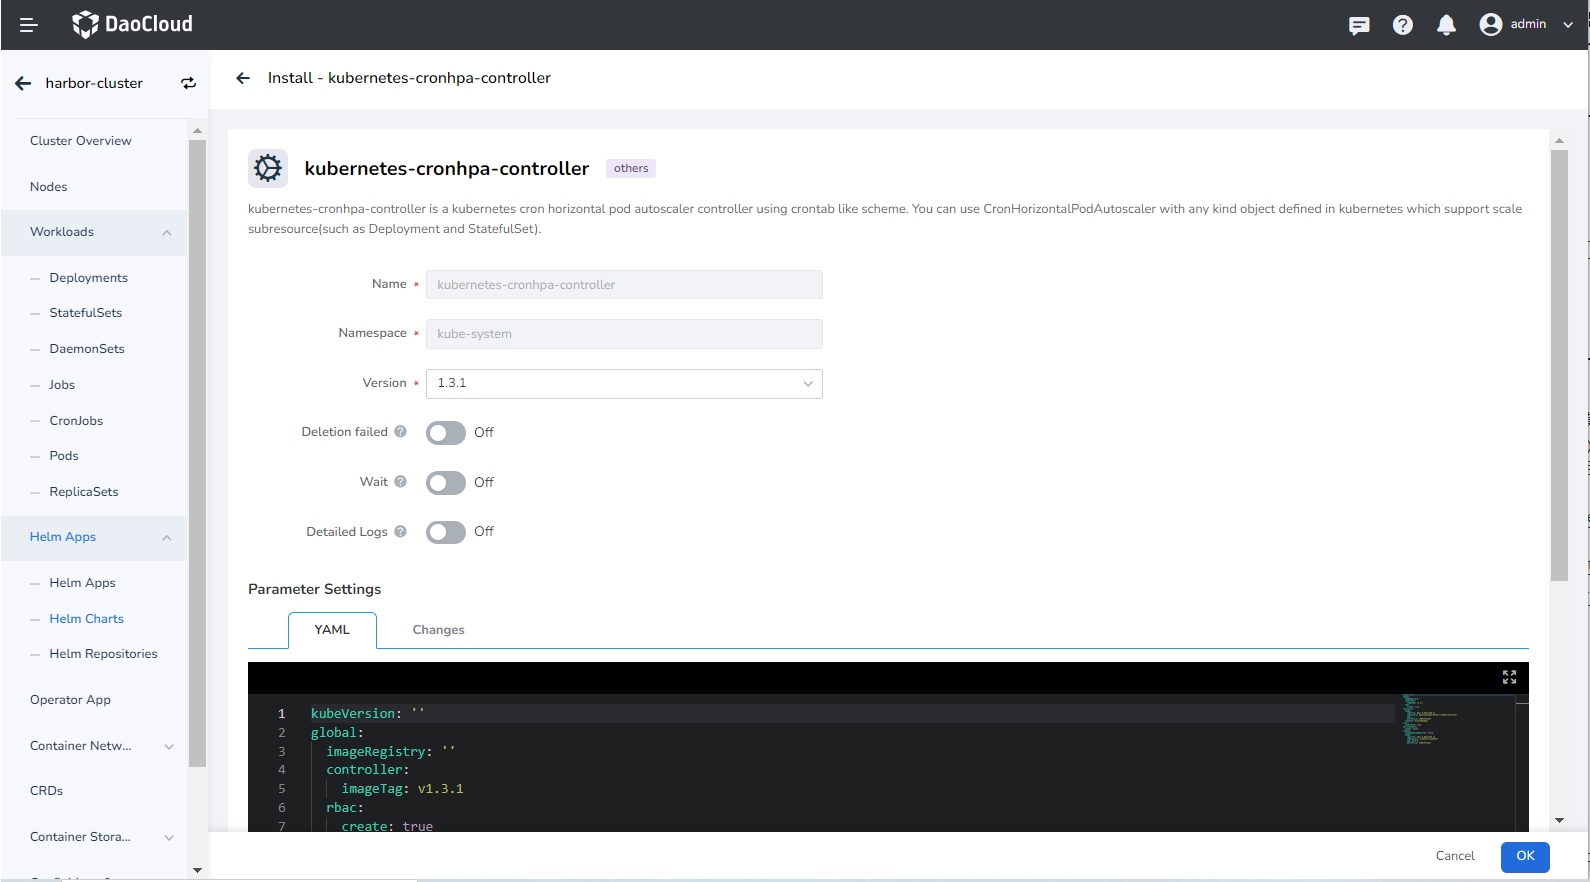
- Name: Enter the plugin name, please note that the name can be up to 63 characters, can only contain lowercase letters, numbers, and separators ("-"), and must start and end with lowercase letters or numbers, such as kubernetes-cronhpa-controller.
- Namespace: Select which namespace the plugin will be installed in, here we take default as an example.
- Version: The version of the plugin, here we take the 1.3.0 version as an example.
- Ready Wait: When enabled, it will wait for all associated resources under the application to be in the ready state before marking the application installation as successful.
- Failed to delete: If the plugin installation fails, delete the associated resources that have already been installed. When enabled, Wait will be enabled synchronously by default.
- Detailed log: When enabled, a detailed log of the installation process will be recorded.
Note
After enabling ready wait and/or failed deletion , it takes a long time for the application to be marked as "running".
-
Click OK in the lower right corner of the page, and the system will automatically jump to the Helm Apps list page. Wait a few minutes and refresh the page to see the application you just installed.
Warning
If you need to delete the kubernetes-cronhpa-controller plugin, you should go to the Helm Apps list page to delete it completely.
If you delete the plug-in under the Auto Scaling tab of the workload, this only deletes the workload copy of the plug-in, and the plug-in itself is still not deleted, and an error will be prompted when the plug-in is reinstalled later.
-
Go back to the Auto Scaling tab under the workload details page, and you can see that the interface displays Plug-in installed . Now it's time to start creating CronHPA policies.